Notes on Turning a Home Server into a Smart Speaker

Table of Contents
My home server currently runs Home Assistant, the FOSS platform for building a smart home. The problem: I don’t own a smart speaker.
So I hooked a speakerphone up to the home server and made it so I can control Home Assistant like a smart speaker.
These are my working notes.
Motivation
I want a maid in my house. Here’s what I expect from her:
- Control smart devices like my desk lamp by voice
- Make announcements in specific situations, based on any values Home Assistant can read
- Warn me out loud when the CO2 level rises, based on my carbon dioxide monitor
- Warn me out loud when the weather starts looking bad
- Have the maid manage my life
- Wake-up calls, bedtime, and so on
Naturally, the voice should not be something like Alexa or Google Assistant. It should be a cute one.
Background
Home Assistant (HAOS) runs on a VM whose hostname is Noelle.
Research
If I waited just a few more days, Black Friday sales would probably have let me pick up an Amazon Echo or similar on the cheap. But from what I read, while you can connect one to Home Assistant, you can’t use its features to the fullest.
Besides, escaping the shackles of big corporations is one of the reasons I run a homelab in the first place, so relying on an Amazon product goes against my philosophy.
There seem to be ways to do it with smart speakers or DIY kits that aren’t tied to the Amazon or Google ecosystems, but they cost a pretty penny.
The following video does it with a Raspberry Pi, and it’s quite close to what I want to do.
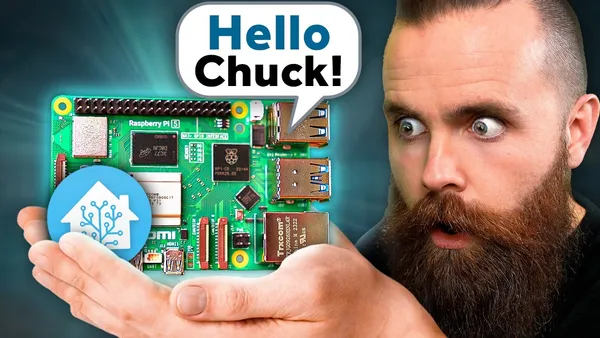
But Raspberry Pis cost a pretty penny too. I want to make do with tools I already have.
So I came up with an idea: “connect a microphone and speaker to my home server, and set up a VM (LXC) that works as a network speaker.”

Work Notes
What follows was written up by Gemini (the AI) from my work log.
Setup Overview
The goal this time is to make an LXC container on Proxmox work as the microphone-and-speaker interface (a satellite), and have it cooperate with Home Assistant (a VM), the brain.
- Hardware:
- Server: Home server (Proxmox VE)
- Audio: Jabra Speak 410 (USB speakerphone)
- Software:
- Host: Proxmox VE 8.x
- Satellite: LXC Container (Debian 12) + Wyoming Satellite
- Brain: Home Assistant OS (VM)
- STT: Whisper
- TTS: VOICEVOX
- Wake Word: openWakeWord
- LLM: Google Gemini
1. Preparing the Proxmox Host and the LXC
First, I need the LXC container to recognize the USB speakerphone (Jabra) connected to the Proxmox host. For security reasons, I insisted on passing the device through while keeping the container an Unprivileged Container. That was the first big hurdle.
1.1. Checking the Device
Check the device on the Proxmox host.
ls -l /dev/snd/When you plug in the Jabra, entries like controlC1 and pcmC1D0p show up. However, an unprivileged container can’t access the host’s device permissions (normally root:audio).
1.2. Rewriting Permissions Automatically with a udev Rule
“root inside the container” is mapped to “UID 100000 on the host.” So I created a udev rule that automatically changes the group to 100000 whenever a sound device is connected.
Create /etc/udev/rules.d/99-lxc-audio.rules:
SUBSYSTEM=="sound", GROUP="100000"Apply the rule:
udevadm control --reload-rulesudevadm triggerNow the owning group of /dev/snd/* is 100000, and everything is ready for the unprivileged container to see it.
1.3. Configuring the LXC Container
I appended the device passthrough settings to the LXC config file (/etc/pve/lxc/105.conf or similar).
The major number of the sound devices was 116, so I wrote the following.
lxc.cgroup2.devices.allow: c 116:* rwmlxc.mount.entry: /dev/snd dev/snd none bind,optional,create=dirRestart the container, then run aplay -l inside it. If you can see the Jabra (Card 1), it worked.
2. Building the Wyoming Satellite (LXC)
For the satellite-side software, I use Wyoming Satellite, which is promoted by Home Assistant itself.
2.1. Installation
Using the official setup script turned out to be the most reliable.
git clone https://github.com/rhasspy/wyoming-satellite.gitcd wyoming-satellitescript/setup2.2. Making It a Service (systemd)
This was the biggest gotcha.
At first I wrote a complicated command using pipes, but in the end the right answer was to just use the official script (script/run) as intended.
Also, because of the AVX instruction set, the server’s CPU (Core i3-7100) didn’t get along with the local wake word detection library, so I went with an architecture where “the satellite just streams the audio nonstop, and the server (HA) detects the wake word.”
/etc/systemd/system/wyoming-satellite.service:
[Unit]Description=Wyoming Satellite for Home AssistantWants=network-online.targetAfter=network-online.target
[Service]Type=simple# The Jabra was recognized as plughw:1,0, so specify it explicitlyExecStart=/root/wyoming-satellite/script/run \ --name "Jabra Speaker" \ --uri "tcp://0.0.0.0:10700" \ --mic-command "arecord -D plughw:1,0 -r 16000 -c 1 -f S16_LE -t raw" \ --snd-command "aplay -D plughw:1,0 -r 22050 -c 1 -f S16_LE -t raw" \ --snd-volume-multiplier 1.0WorkingDirectory=/root/wyoming-satelliteUser=rootRestart=alwaysRestartSec=1
[Install]WantedBy=multi-user.target3. Configuring Home Assistant
On the HA side, we assemble the “ears,” “mouth,” and “brain.”
Note: At this point my home server has become a virtual Wyoming Satellite, so from here on you can basically follow the video above.
3.1. Installing Add-ons
I installed the following official/community add-ons.
- Whisper: Speech recognition (STT). The model is
base-int8and the language isja. - VOICEVOX: Speech synthesis (TTS). The setup is to install the integration through HACS and run the engine separately in Docker (as an add-on). You can use voices like Zundamon and Shikoku Metan.
- openWakeWord: Wake word detection. It picks up wake words like “Okay Nabu” from the audio stream sent by the satellite.
* I also had the bad luck of running into a HACS server outage while building this, but I waited for it to come back and that solved it.
3.2. Wyoming Protocol Integration
Add Wyoming Protocol from “Settings” > “Devices & Services.”
Specify the LXC container’s IP address and port (10700), and Jabra Speaker gets recognized.
3.3. Creating the Assist Pipeline
Create a new pipeline under “Settings” > “Voice assistants.”
- Language: Japanese
- Conversation agent: Google Generative AI Conversation (Gemini)
- STT: Whisper
- TTS: VOICEVOX TTS
- Wake word: openWakeWord
In the “Proxmox Speaker” device’s settings, use this pipeline and set wake word detection to “Processed in Home Assistant”, and the always-streaming setup is complete.
4. Forming a “Personality” with an LLM
For the conversation agent, I used Google Gemini (API). The standard Home Assistant agent only listens to commands like “turn on the lights,” but with an LLM, small talk becomes possible too.
I put something like the following into the system prompt (Instructions) to give it a character.
Please act as Noelle from "Genshin Impact".Always speak in a devoted and polite manner.(The original prompt was written in Japanese; this is a translation.)
5. Automating the Wake-Up Call
To finish up, I built an automation that greets me at a set time every morning. It’s a hybrid setup: I pass sensor values (weather and CO2 level) to Gemini to generate a “one-line comment,” then have VOICEVOX speak it.
Example automation (Action part):
- Conversation: Process
- Have Gemini come up with a “one-line comment based on the weather and the CO2 level” and store it in the variable
noelle_comment.
- Have Gemini come up with a “one-line comment based on the weather and the CO2 level” and store it in the variable
- Assist Satellite: Announce
- Target: Jabra Speaker
- Message (the actual message is in Japanese; the English below is a translation):
Good morning, Honorary Knight.The current temperature is {{ state_attr('weather.forecast_home', 'temperature') }} degrees.The carbon dioxide level in your room is {{ states('sensor.co2_sensor') }} ppm.{{ noelle_comment.response.speech.plain.speech }}
That’s the end of Gemini’s write-up.
Future Work
I managed to build what I’d hoped for, but I want to improve the following.
Adopting a Local LLM
From the standpoint of ditching Google and Amazon, a local LLM would be the way to go. If the server had a GPU, I’d have liked to run something like Llama. I did consider setting up an LLM server on my everyday PC, but that makes the system way too complicated, and I’d no longer be able to power off my everyday PC.
Improving Wake Word Detection
Right now it wakes up on “OK, Nabu,” but since I’m treating Home Assistant as Noelle, the wake word should be “Noelle.”
Judging from the video at the very top, this looks like something I can do pretty soon.
Improving the Voice
For the same reason, I want her to speak in Noelle’s voice. Technically it looks doable, but it raises problems of cost, response time, and ethics.
That said, the VOICEVOX voice is plenty cute, so maybe it’s fine as it is.
(I went with VOICEVOX Chugoku Usagi (surprised).)
More Smart Devices
Right now, the only devices connected to Home Assistant are a CO2 meter (it can technically measure temperature and humidity too) and a desk lamp. I want more.
Live in a Bigger House
Automating a tiny room doesn’t feel like much of a payoff.
Summary
I struggled with the permissions around LXC and with understanding how Home Assistant pipelines work (especially where the wake word gets detected), but in the end I got a very satisfying homemade smart speaker.
I made use of resources I already had, prioritized privacy, and built an environment where a nice voice and personality support my daily life, for almost zero yen.
More articles
- Guarding the Heart, or a Lightning Flash of Admonition• #HomelabAn unsettling short story written by Gemini 3 Pro Preview.

- Noelle Has Come to My Home• #HomelabBy combining Home Assistant, the Wyoming Protocol, Style-Bert-VITS2 and more, I turned my home server into a Noelle smart speaker.

- Making Style-Bert-VITS2 Speak in Home Assistant, a Work Log• #HomelabI wrote a custom component for Home Assistant dedicated to Style-Bert-VITS2.

- Noelle Reporting for Duty! (Building the AI Agent Ineffa)• #HomelabA record of how the Clawdbot-based AI agent "Ineffa (Noelle)" overcame a series of troubles and finally went live.


Notes on games, radio and technology, translated from the Japanese blog.