Noelle Has Come to My Home

Table of Contents
Continuing from the previous post.
Notes on Turning a Home Server into a Smart Speaker I connected a Jabra Speak 510 to Home Assistant via the Wyoming Protocol and used VOICEVOX for speech synthesis, which turned my home server into a smart speaker.
But once you get this far, you want to go further. VOICEVOX: Chugoku Usagi’s voice is cute too, but still, I want Noelle (the Genshin Impact character) to be the one supporting my daily life.
So I spent an entire three-day weekend building a voice model of Noelle and installing it on my home server.
What follows is my work log, handed to Gemini 3 to write up, with my own touch-ups to fix factual errors and fill in explanations.
1. The Technology to Aim For: Style-Bert-VITS2
First, I had to pick the technology. For reproducing character voices, the one that’s currently rated highest in the community is Style-Bert-VITS2.

It uses an approach called “transfer learning”: you take a huge base model that already speaks fluent Japanese, and then train it afterwards on just a specific character’s “voice quality” and “speaking habits”. The upshot is that even a relatively small amount of audio data (a few minutes to a few dozen minutes) can produce a surprisingly high-quality voice model.
The goal was set. All that remained was getting my hands on the raw material: “Noelle’s voice”.
2. Gathering Material: Finding “Noelle” Among 420,000 Voice Clips
Luckily, there was an absolutely insane dataset on Hugging Face called simon3000/genshin-voice, covering the voices of every Genshin Impact character in every language. A veritable treasure trove.

However, this dataset has over 420,000 rows. Hunting down Noelle’s voice in there by hand would be reckless. So I decided to write a Python script on Google Colab to extract only the data that is “Japanese” and “spoken by Noelle”.
Failure Story 1: The Reckless Challenge of Scanning Everything
At first, I wrote a script that streamed the dataset and scanned every single row.
# 失敗したコードds = load_dataset("simon3000/genshin-voice", split="train", streaming=True)for sample in ds: if sample['speaker'] == 'Noelle' and sample['language'] == 'Japanese': # ... 保存処理 ...That was naive. The connection to Hugging Face kept dropping, and the Colab session timed out too. There was no telling how many days this would take.
So I decided to just manually grab the 36 entries on the first page of search results in the dataset’s preview screen and try with those first.
My everyday PC has a GTX 1060 in it. I figured that would be enough, and tried training locally.
Setting up the environment was a fight against errors, but I somehow got the training process started. The estimated time remaining it showed, though, was “40 hours”. A hopeless number.
The cause was lack of VRAM. When VRAM runs short, data gets swapped with the slow main memory, and performance falls off a cliff to less than 1/100.
I gave up on training locally.
The Fix: The Power of the Cloud Is Great
Back to Google Colab, and this time I decided to use the Style-Bert-VITS2 training notebook that the community has published. Even on the free tier, you get assigned a powerful GPU, an NVIDIA T4 (16 GB VRAM).
I uploaded the audio data I’d collected and ran the notebook from top to bottom. But I ran into several more troubles here too. The preprocessing wouldn’t work properly on Colab.
On the other hand, running it locally worked once I applied the fixes described in this Issue.

But locally I don’t have enough VRAM. So I decided to run only the preprocessing locally, then upload the generated data to Colab and continue the training there.
4. And Thus, a “Soul” Was Born
When training finished, three files were generated.
noelle.safetensors(the model’s weights)config.json(the model’s configuration)style_vectors.npy(the voice’s style information)
These are the “soul data”, a concentrate of Noelle’s voice quality, intonation and speaking habits. I typed in some test text, and the generated audio played back.
Noelle’s voice was right there, so natural and fluent that you’d never guess it was generated from 36 files, less than 5 minutes of training data.
And so I finally obtained “Noelle’s soul”. But this was merely the prologue to the story. Before I could house this soul in the “vessel” of a Proxmox server and link it up with the “body” that is Home Assistant, even more hellish troubleshooting awaited.
The Hell of Housing the Soul in a Server: The Death Match Against LXC, Docker and AppArmor
Thanks to Google Colab, I succeeded in forging an AI model with “Noelle’s real voice”. But that was still just data sitting in the cloud. The ritual of summoning it as the “voice” running on my home server and linking it with the “body” that is Home Assistant turned out to be unimaginably difficult.
This is the complete record of the gritty infrastructure work and the fight against errors: running Docker inside a Proxmox LXC container and calling a homemade AI model from Home Assistant.
1. Preparing the Vessel: Designing the Inference Server
First, I needed a “vessel” to run the finished model. Style-Bert-VITS2 is written in Python and has complicated dependencies, so isolating it in a Docker container is the standard approach.
- Host: A Proxmox LXC container. Lighter than a VM, and plenty for just running Docker.
- Container OS: Ubuntu 24.04
- Runtime: Docker
- Docker image: litagin/style-bert-vits2
Generating speech (inference) on the CPU is demanding, so I gave the LXC 4 CPU cores and 8 GB of memory.
2. The LXC and Docker Wall: The Death Match Against AppArmor
I spun up the LXC container with high hopes, installed Docker, and the moment I hit docker compose up, the first wall stood in my way.
Error response from daemon: ... permission deniedThe cause was the strict security mechanisms of an unprivileged LXC container, especially AppArmor. Running Docker inside a container is a “nested” structure that requires the host OS’s kernel features, so it gets blocked as a “dangerous act” from a security standpoint.
The Solution: Loosening the LXC Container Settings
After a long dialogue with errors, I managed to get around it by adding the following “magic spell”, taught to me by Gemini, to the LXC config file (/etc/pve/lxc/106.conf).
features: nesting=1,keyctl=1lxc.apparmor.profile: unconfinedlxc.cgroup.devices.allow: alxc.cap.drop:This lifts AppArmor’s restrictions on the container and allows access to the kernel features Docker needs, which completely defeats the point of using an unprivileged container in the first place.
It worked as a stopgap, but it carries security risks, so I’ll have to fix it later.
3. Wrestling with the Docker Image
I got over the LXC wall. But the Docker container still wouldn’t cooperate.
docker compose logs showed one new error after another.
After much trial and error, the victory log finally appeared: Uvicorn running on http://0.0.0.0:5000.
4. Calling It from Home Assistant: The Final Despair
The server was running. Opening http://<LXC's IP>:5000/docs from my PC’s browser showed the API documentation. Perfect.
All that was left was to hit this API from Home Assistant. But this was the deepest rabbit hole of all.
curlfrom the HA terminal:Connection refused.curlfrom the PC terminal: Success.
It connects from the PC, but not from the HA VM on the same network.
The LXC firewall was off (No). I hadn’t configured the Proxmox firewall either. No IP conflicts.
I held my head in my hands for hours over this error of unknown cause.
In the end, the problem turned out to be a network inconsistency caused by the LXC’s permission settings.
The lxc.cgroup.devices.allow: a and lxc.cap.drop: I had added earlier were, it turns out, the final key to letting the Docker container expose its ports to the outside properly.
And so I finally managed to hit my homemade AI model’s API from Home Assistant and get a WAV file back. “Noelle’s soul” had at last taken residence in the “vessel” that is the server.
But my joy was short-lived. The last, and most troublesome, wall stood in my way. A mysterious phenomenon: “if I make her say anything longer than 100 characters, it fails silently.”
Break Through the Wall with a Custom Component: Achieving Fully Local, Long-Text TTS
Having overcome the triple whammy of LXC, Docker and AppArmor, I had finally succeeded in calling my homemade “Noelle’s voice” from Home Assistant. But the moment I tried to make her say something long, like a morning call, the final wall appeared.
“When I request a text over 100 characters, the server fails silently.”
Short greetings work, but long sentences don’t. This is the record of the last battle to solve this baffling phenomenon and integrate the system perfectly.
The Last Wall: The Truth Behind the “100-Character Wall”
First, I isolated the cause.
Even with the same long text, hitting the API directly from the PC’s browser generates audio fine. But running it through a Home Assistant automation (media_player.play_media) fails.
I’ve split this part out into the following article.
Making Style-Bert-VITS2 Speak in Home Assistant, a Work Log After restarting Home Assistant, my homemade “Style-Bert-VITS2” showed up as a text-to-speech engine under “Settings” > “Voice assistants”. Simply selecting it completed all the preparations.
When I ran the morning call automation, which had been failing to play long text until now, after a few seconds of silence, finally, a long passage of over 300 characters played, unbroken, in Noelle’s smooth voice. It was the moment the wall fell.
And Then, She Began to Speak
At the end of this long journey, my Home Assistant has finally become its ideal form.
This system, built by tinkering with everything myself, from hardware to software to the AI model, gave me a sense of achievement and an attachment that no store-bought smart speaker could ever offer.
I think everyone in the human race wishes for a cute, caring maid to live at home. Realizing this dream, which existing smart speakers can’t fulfill, with a home server, open-source software and my own speech synthesis model is a joy I wouldn’t trade for anything.
That’s the end of the Gemini 3 transcription.
Future Work
Here is what’s left to do.
Make the Wake Word “OK Noelle”
I want to change the Wyoming Protocol’s wake word detection to “OK Noelle”. Right now it’s “OK Nabu”.
I should be able to train one in the Colab below, but it doesn’t work properly.

I Want Noelle to Manage the Whole House
I have a decent set of sensors, but few devices I can actually move, so I want to bring in smart relays and smart plugs.
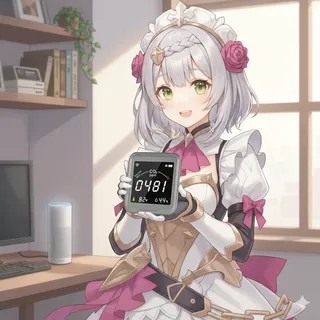
For example, Noelle as she is now can issue a warning when the CO2 level goes over a threshold, but she can’t open the window automatically. But Noelle would surely do it on her own, I’m sure of it.
I Want Noelle to Manage Me
First off, what even is a maid… (creepily). What I want is not a 100% devoted maid, but a maid who cares about my health and daily rhythm, and who sometimes disciplines me strictly. And Noelle is exactly the right fit for that.
I’m a bit useless in an argument because I can’t really explain my reasoning clearly. People find that hard to understand, so instead, I try to just get on with my work in my own way. But then they call me stubborn. All I try to do is convince people with results instead of trying to talk them round… Is that really stubborn of me?
About Noelle: Disagreement
There’s a voice line like that, and when you think of Noelle’s signature weapon, it’s “Debate Club”.
So, for example, I’d like to make the following happen.
- Every morning, prompt me to weigh myself
- Manage my mealtimes and nag me to cut back on snacks
- Prompt me to exercise and hydrate
- Manage my sleep time and urge me to go to bed and get up early
I think Home Assistant’s sensors and automations can handle these. But no matter how cutely she lectures me, people won’t move without the use of physical force. Some kind of punitive feedback will be necessary.
More articles
- Guarding the Heart, or a Lightning Flash of Admonition• #HomelabAn unsettling short story written by Gemini 3 Pro Preview.

- Making Style-Bert-VITS2 Speak in Home Assistant, a Work Log• #HomelabI wrote a custom component for Home Assistant dedicated to Style-Bert-VITS2.

- Notes on Turning a Home Server into a Smart Speaker• #HomelabI turned my home server into a smart speaker by combining Home Assistant, the Wyoming Protocol, a Jabra speakerphone, and VOICEVOX.
- Noelle Reporting for Duty! (Building the AI Agent Ineffa)• #HomelabA record of how the Clawdbot-based AI agent "Ineffa (Noelle)" overcame a series of troubles and finally went live.


Notes on games, radio and technology, translated from the Japanese blog.