Let's Mod Genshin Impact and Have Some Fun

Table of Contents
I tried installing mods on Genshin Impact. In this post, I’ll introduce you to modding Genshin.
Introduction
Install mods at your own risk. Even if you get banned, your PC gets infected with malware, or you suffer any kind of disadvantage as a result of following this article, I assume no responsibility whatsoever!!!
The Risk of Getting Banned
As a baseline, using external tools is explicitly prohibited by the Terms of Service.
20. The act of using external tools (BOTs) or programs not officially provided by COGNOSPHERE PTE. LTD. to gain an unfair advantage in game progression or to interfere with the normal use of services.
So if you get banned for using mods, you don’t have a leg to stand on!
On the other hand, if you ask whether there are actual cases of people getting banned for using mods, there appear to be almost none (at least from what I looked up on overseas forums and videos). With tens of millions of users worldwide and so few ban cases from mod usage, unless you have shockingly bad luck or their policy on mods changes, you should probably be fine.
Also, Genshin mods basically operate via methods that are impossible (or at least difficult) to detect on the server side. It’s essentially rewriting the assets that are supposed to be loaded before the client renders them.
This is purely my own speculation, but I imagine miHoYo’s stance is something like:
- Actions that cause clear damage to operations—like duping gacha currency or affecting other players in co-op—are strictly targeted for bans
- Actions that just alter appearances slightly without causing harm are tacitly tolerated
I think that’s likely the stance. So unless you do something like:
- Clearly showing that mods are installed
- With your UID publicly visible
- Taking screenshots or videos and posting them on the internet, which then get reported by a third party
…you shouldn’t see any enforcement action taken against you.
To reiterate, this is just my personal view. I assume no responsibility if you get banned as a result of following this article.
If you’re still worried no matter what, I recommend not using mods on your main account, but instead making an alt account and only running them there.
Installation Using XXMI-Launcher
There seem to be several methods out there, but I’ll introduce the one that was the easiest to understand and the most stable.
My OS is Windows, but apparently the same steps work on Linux + WINE.
First, install XXMI-Launcher. By using this instead of the regular launcher, you can easily inject mods and launch the game.

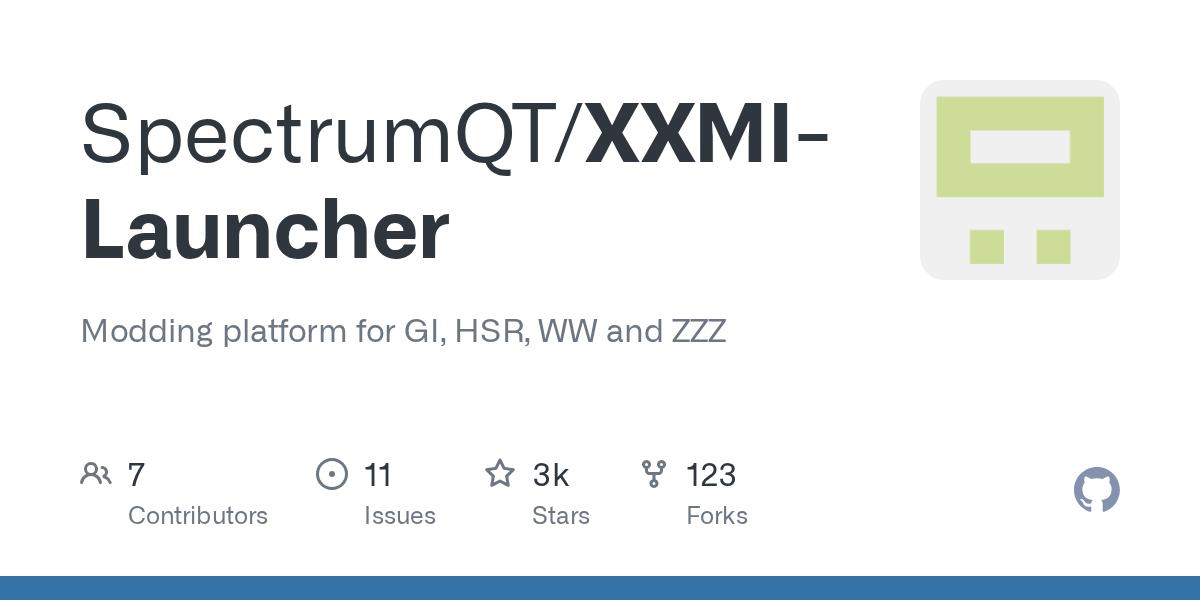
Proceed according to the instructions in the Installation section.
-
Native Windows App (Windows only)
- Download the latest release of XXMI-Launcher-Installer-Online-vX.X.X.msi
- Double-click XXMI-Launcher-Installer-Online-vX.X.X.msi to run it
- Click [Quick Installation] to install XXMI Launcher to the default location (
%AppData%\XXMI Launcher), or use [Custom Installation] to specify a different folder - On the game selection page in the XXMI Launcher window, click your desired game tile to add a model importer icon to the top-left corner
- Click the model importer icon to open the model importer page, then hit the [Install] button to download and install the selected model importer
-
Portable Edition (for Windows and Linux via WINE 9.22+)
- Download and install the latest Microsoft Visual C++ Redistributable package
- Download the latest release of XXMI-Launcher-Portable-vX.X.X.zip
- Extract the archive to your desired location (avoid the Program Files folder!)
- For convenience, create a shortcut to
Resources\Bin\XXMI Launcher.exeand run it - On the game selection page in the XXMI Launcher window, click your desired game tile to add a model importer icon to the top-left corner
- Click the model importer icon to open the model importer page, then hit the [Install] button to download and install the selected model importer
 Select the model importer icon in the top left.
Once the installation is complete, you should see a screen like this:

Click the kebab button ︙ to the right of Start → Open Mods Folder, and the mod storage folder /XXMI Launcher/GIMI/Mods will open.
Drop your mods in here, hit Start on that previous screen, and the game will launch with the mods injected.
HideUID
From here on, I’ll introduce my recommended QoL mods and how to install them.
First is a mod that hides the UID displayed in the bottom-right corner of the screen. As mentioned earlier, let’s keep our UID hidden as a precautionary defense measure.
Download hideuid3.zip from below and extract it:
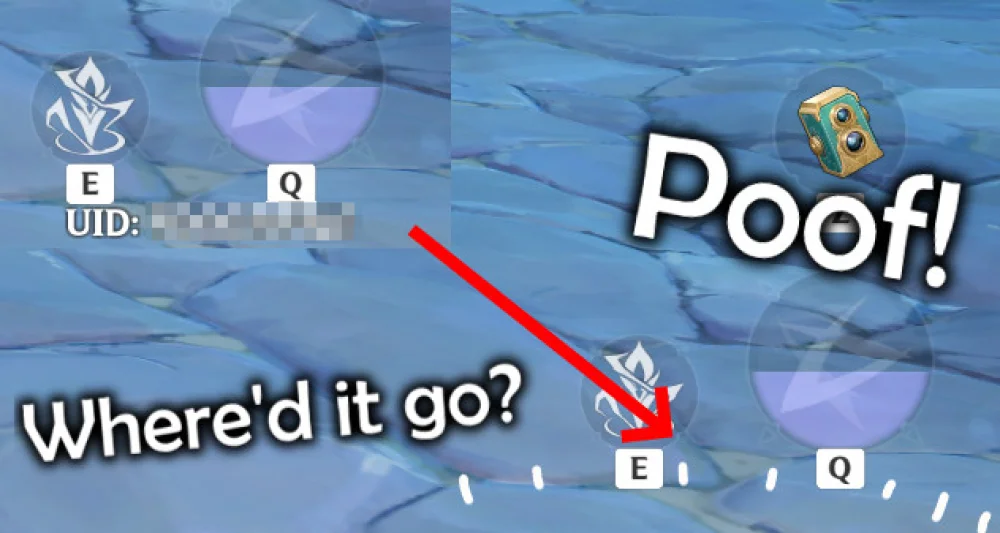
Open HideUID.ini inside the extracted folder, edit it as follows, and save (overwrite):
[Constants]
global persist $HideUID = 1
[KeySwitch]
key = alt F11
type = cycle
$HideUID = 0,1
[TextureOverrideUid]
hash = 83fd403f
match_first_index = 0
run = CommandListUID
[CommandListUID]
if $HideUID == 1
handling = skip
endifTo be honest, I’m not entirely sure what this is doing under the hood, but I presume it targets the texture with the hash value 83fd403f (the UID display area) and processes it.
After editing, move this folder to your mods folder. As long as the final path looks something like GIMI/Mods/HideUID, you’re all set.
Blanka UI - Modification HUD
This changes the UI to a darker color scheme. The modifications cover a wide range of elements, including the map and menu icons, but two points are especially crucial:
- Conceals the UID shown when opening the menu
- Changes the loading screen from blinding pure white to pure black
Download the latest stable version from below, extract it just like before, and put it in Mods:
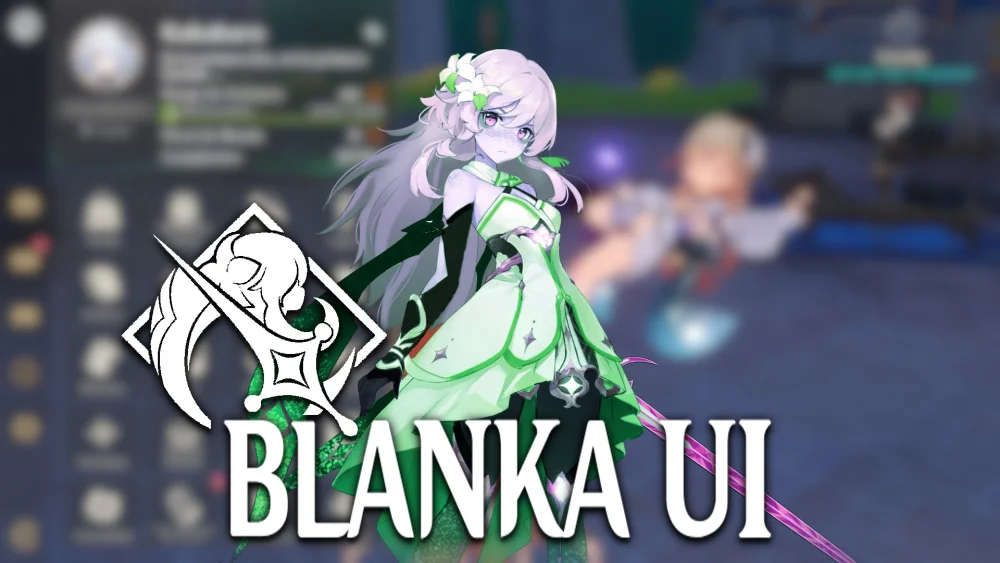


This won’t happen to you anymore.

Ability Timer
This mod displays the active duration and cooldown of critical Elemental Skills and Elemental Bursts right on top of character icons.
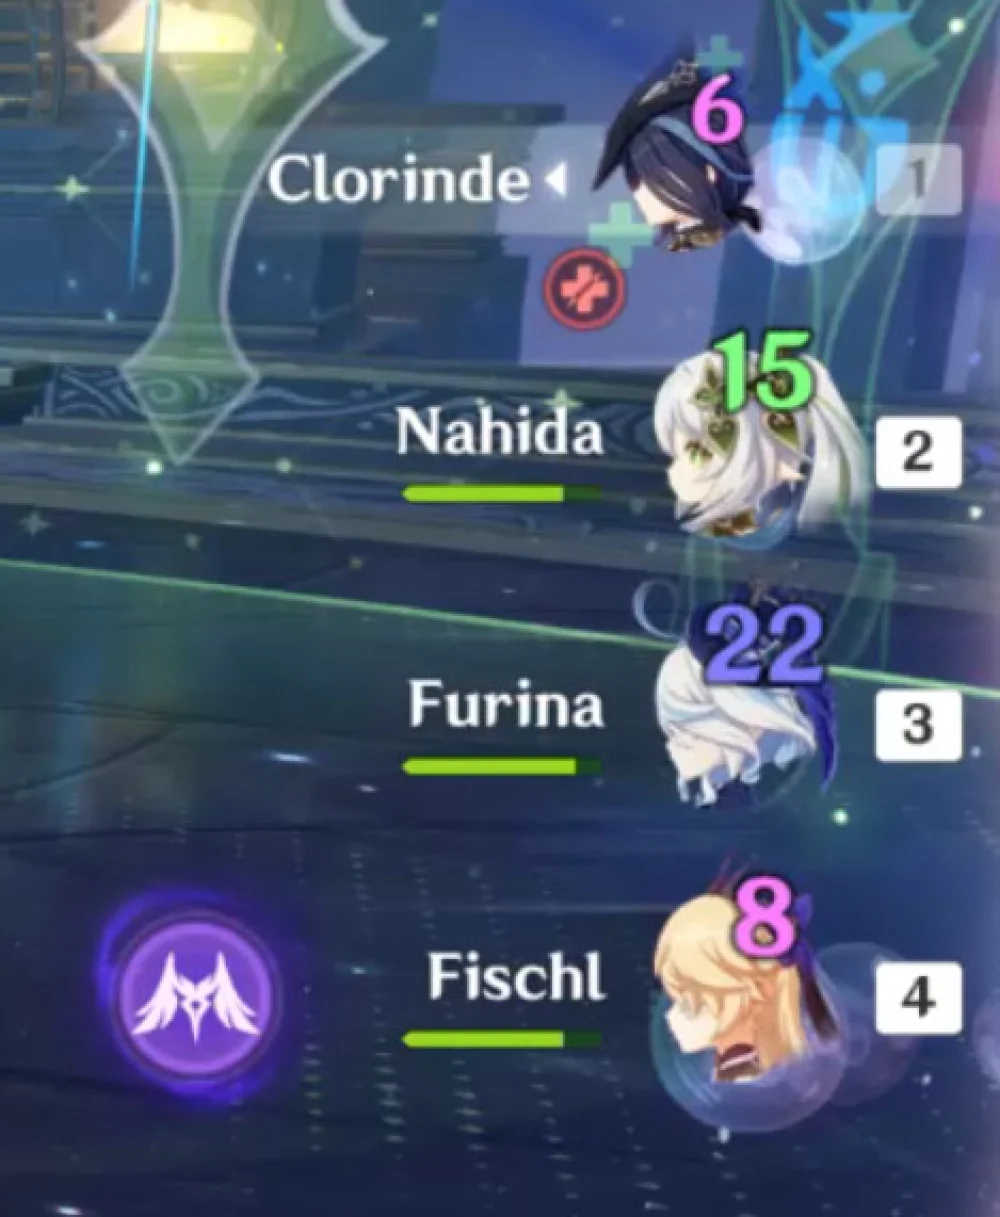
 It looks like this in action.
Crucial timers are tailor-made for each character. Please read the description on the page above for full details.
Here are a few examples:
Nahida: Burst = 15-26s
Her Burst’s duration depends on both its Talent level and the number of Hydro characters in the party (and the requirements are relaxed by her C1). As of version 2.0, this mod automatically detects the number of Hydro characters in the party, and by default uses Talent level 10 with C1 active. For detailed instructions on what values to change according to your Nahida’s Constellations and Talent level, refer to her counter.ini file (lines 48–51).
When detecting Hydro Traveler, the mod can detect that the Traveler is in the party, but cannot detect the Traveler’s element while off-field (which is required for Nahida’s detection). Because of this, you need to change the value in Nahida’s counter.ini file (see lines 50–54) to manually set whether your Traveler is currently set to Hydro. It defaults to off (who actually uses Hydro Traveler anyway?).
Nahida: Burst = 15-26s
Her Burst’s duration is both dependent on its Talent level as well as the amount of Hydro characters in the party (and affected by her C1 to relax the requirement). As of 2.0, the mod will auto-detect how many Hydro characters are currently in the party and, by default, uses Talent level 10 with C1 active. See her counter.ini file (LINES 48-51) for detailed instructions on what values to change for your Nahida’s Constellation and Talent level.
For detecting Hydro Traveler, the mod can detect when Traveler is in the party, but cannot detect Traveler’s element while they are off-field (which is necessary for Nahida’s detection). Due to this, you have to manually set whether you currently have Traveler set to Hydro by changing a value in Nahida’s counter.ini file (see LINES 50-54). It defaults to being off (since who actually uses Hydro Traveler?).
Noelle: Skill = 12s / Burst = 15s
Two timers are tracked simultaneously on Noelle’s team icon. The duration timer of her Burst is shown with the usual black glow around the number, and the timer for her Breastplate shield created by her Skill is shown with a white glow.
She is a character who gets a lot of hitlag extension on her Burst’s duration, so the Burst timer will end much sooner than the buff in most cases. On top of that, this timer doesn’t track her C6’s ability to extend the duration of her Burst. But it’s not that necessary, as her default duration, even without hitlag extensions, is already the same length as its cooldown.
Noelle: Skill = 12s / Burst = 15s
Two timers are tracked for Noelle simultaneously on her team icon. The duration timer of her Burst is shown with the usual black glow around the number, and the timer for her Breastplate shield created by her Skill is shown with a white glow.
She is a character that gets a lot of hitlag extension on her Burst’s duration, so the Burst timer will end much sooner than the buff in most cases. On top of that, this timer doesn’t track her C6’s ability to extend the duration of her Burst. But it’s not that necessary, as her default duration, even without hitlag extensions, is already the same length as its cooldown.
Xingqiu: Burst = 18s
Configured for C2+ timing. If you don’t have his C2, see his counter.ini file.
Xingqiu: Burst = 18s
Timed for C2+. See his counter.ini file if you don’t have his C2.
Kuki Shinobu: Skill = 15s
Configured for C2+ timing. If you don’t have her C2, see her counter.ini file.
Kuki Shinobu: Skill = 15s
Timed for C2+. See her counter.ini file if you don’t have her C2
Managing buff and effect durations becomes ridiculously easy. It almost steps past QoL improvement into borderline cheating, but my feeling that “at least show buff durations by default, dammit” was so strong that I went ahead and installed it.
Region based Lumine outfits
While not a QoL improvement, this is a wonderful costume-swap mod.
The Traveler (Lumine)‘s outfit changes dynamically depending on the current region.
The installation method is the same as before.
To activate it, you must press the ] key in-game!!!
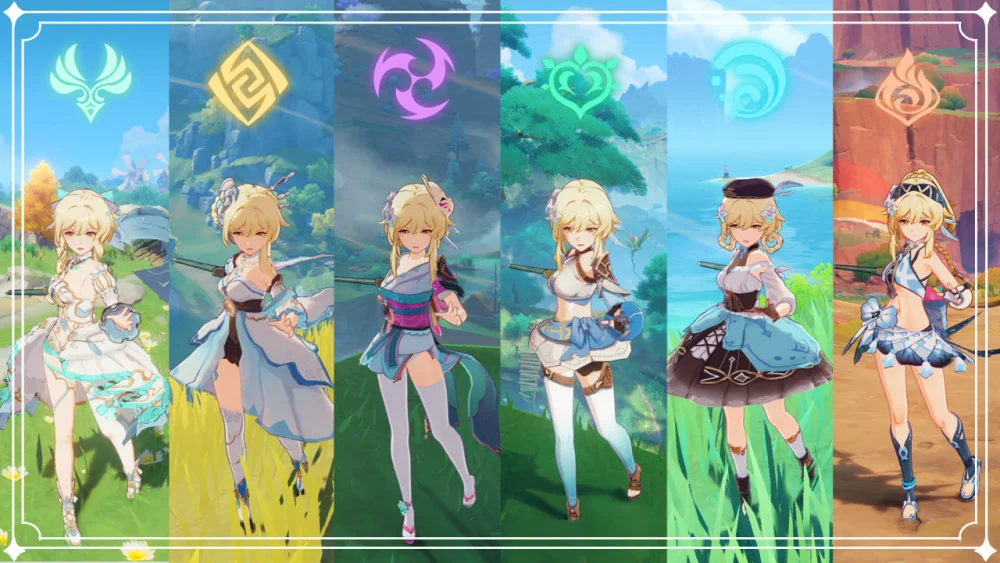

Cute. It brings out the feeling of enjoying a journey even more, which is wonderful.
Given that costumes are sold in-game, outfit-modifying mods represent a rather clear conflict of interest against the operators, so I do think it’s a bit risky… Then again, I installed it because I felt so strongly: “Why isn’t this a base game feature in the first place?” Besides, Lumine doesn’t even have any other official outfits anyway.
Conclusion
And that covers how to install mods for Genshin Impact and a few recommended mods.
I’ll say it again: install mods at your own risk. Even if you get banned, your PC gets infected with malware, or you suffer any kind of disadvantage from following this article, I assume no responsibility whatsoever!!!
You definitely shouldn’t do this on an account where you’ve spent heavily (whaled). On the other hand, if like me you’re in a spot where:
- You haven’t spent that much money
- You’re starting to get a little bored
…then I think it acts as great spice to rekindle your motivation for Genshin Impact.
More articles
- Impressions of Genshin Impact Ver. 7.1 Snezhnaya, Up Through Act IV "A Rekviem for the Underworld"• #Genshin ImpactAfter two years, I've finally caught up with the current release.
- Thoughts on Genshin Impact's Nod-Krai Storyline• #Genshin ImpactI finished Nod-Krai.
- I Had "AI Mona" Analyze the Raw METEOR-M2 4 Weather Satellite Data• #RTL-SDRBased on the raw WAV data of METEOR-M2 4 that I received at a temple in the dead of night, I had Astrologist Mona Megistus (Gemini) explain the whole thing.
- Genshin Impact 2026 Theater of Memories• #Genshin ImpactHow my 2026 went in Genshin Impact.
Notes on games, radio and technology, translated from the Japanese blog.